

Monday, October 31, 2005
Polypropelyne Cold Weather Gear
At work the other night, Jeff and I were talking about "Under Armour" Cold Weather Gear that we could wear under our police uniforms. We both can't stand wearing a coat or jacket while working. He mentioned that he had bought some military cold gear made with Polypropelyne from eBay. When he got it, he realized that it might be to thick to wear under his uniform. He said it might work pretty good for my motorcycle (He thinks I am crazy for riding the bike, as cold as it has been). Last night, he brought it to work, both a long sleeve shirt and pants.
After my shift at work, I tried the shirt & pants on to see if they fit. I immediately felt my body heat staying with my body. To say the least, this stuff is warm! I decided to keep my new duds on and test it on my ride home. At 3:00 AM, the temperature was 36 Degrees (F) with the black ice alarm going off. I put on the gear that I rode into work with, a JoeRocket Mesh Jacket with armor, my waste length heavy coat and my leather boots and winter riding gloves. I already had on 2 pairs of socks, the Polypropelyne suit and my t-shirt. The heated grips were turned on. Off I went on the bike for the 8 mile ride home. This stuff kept me pretty damn warm. The only place that I felt cold were my cheeks and eye balls and that's only because I had to crack the face shield due to it fogging up on me.
Now, if I can only find some sort of protection from the deer I saw on my way home. In just 8 miles, I saw, at least a dozen deer. Not a good feeling when you're only on 2 wheels.
Saturday, October 15, 2005
Living with it
Well, I have put about 50 miles on the bike since changing the head bearings. The head shake is still there. I have tightened the bearings up a bit, but with no difference. This annoying head shake has been with this bike since I've owned it. The head bearings are good, the forks are straight, the wheel bearings are good, the tire is balanced. Someone mentioned changing the swingarm bearings. Right now, I am going to live with what I got. I may tighten the head bearings again after a couple hundred miles. When the snow starts to fly, I will consider changing out the swingarm bearings. The cure for the head shake is out there. However, right now, the fight against the shake will be scaled back temporarily. I am going to get as many riding days in as I can, until the tires lose traction in the snow.
Sunday, October 09, 2005
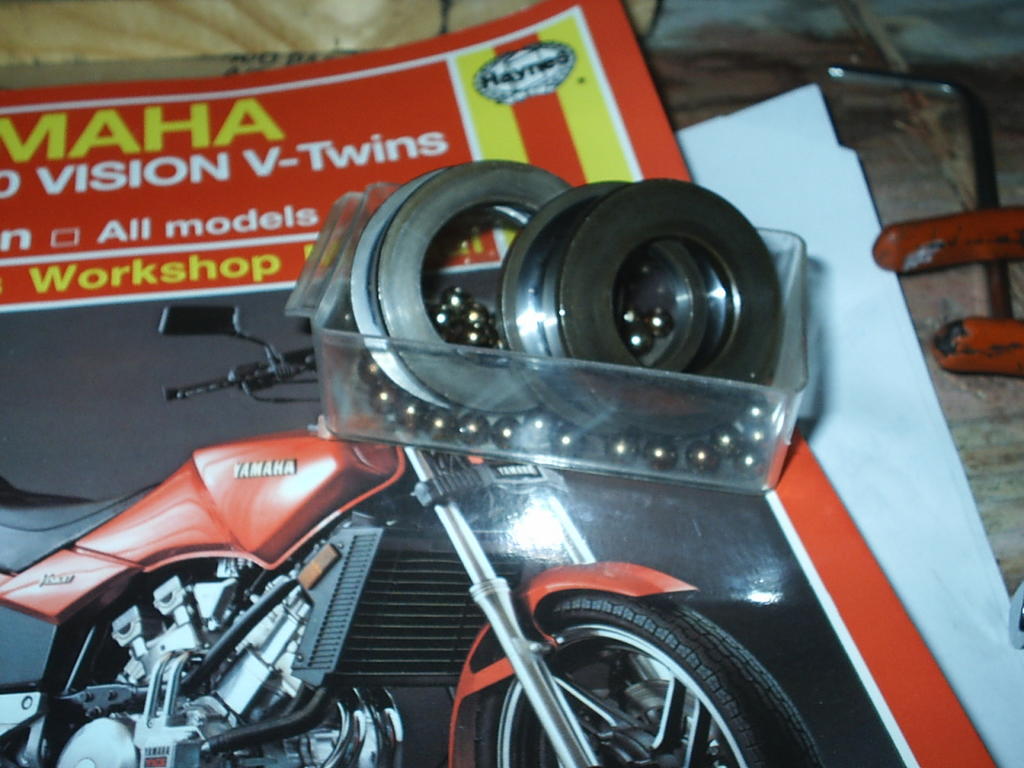
No More Balls

Well, it was time to replace the head bearings on the Vision with tapered head bearings from All Balls Bearings. It was rather unnerving having to dismantle the bike as far as I did, especially by someone who has no mechanical training. Mechanically inclined, yes... Professional mechanic, not by a long shot. Seeing my bike in this state really was scary, not knowing if I would be able to put it all back together again. Now that is it done, I feel a lot better. Things that still need to be done this winter: Starter Clutch Bolt Fix, Shift Shaft Seal Replaced, Balancer Nut, Front Wheel Bearings, oh the list just keeps on going.....
Headless
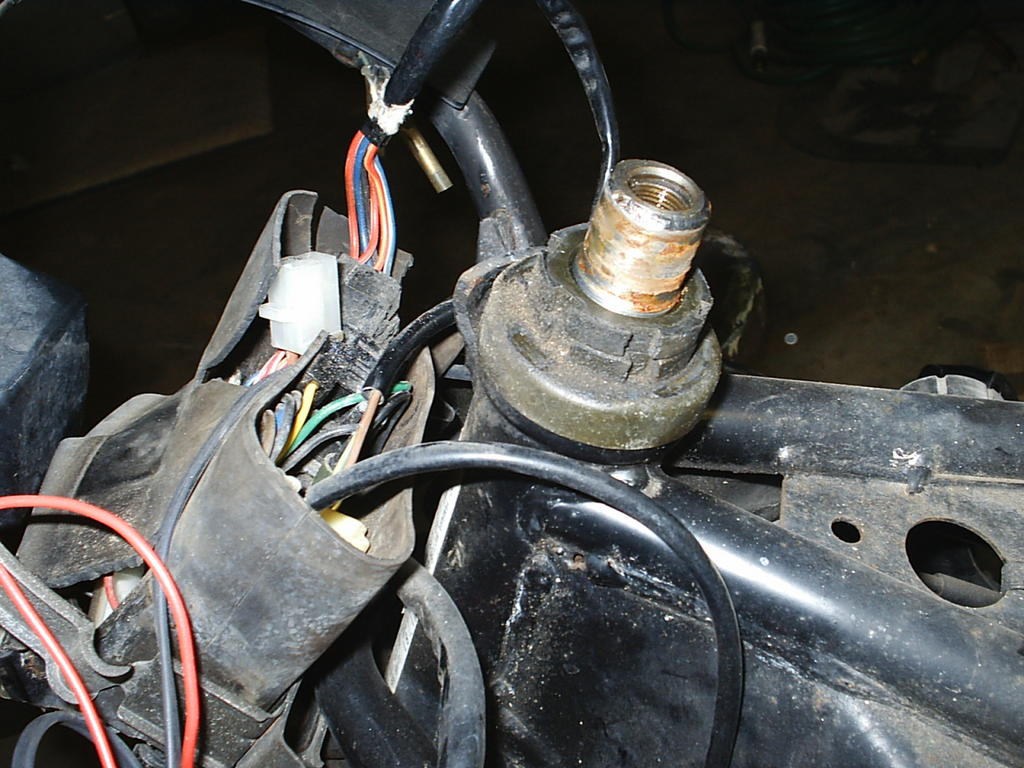

Removing everything on the bike to get to the head bearings was easier than I thought. I started with removing the front wheel and the forks, Removing the handle bars and instrument cluster, removing the ignition and idiot lights. I did find that there are a lot more wires hidden behind the headlight than I ever thought possible. I was able to use a pair of vise grips instead of a spanner wrench on the lock nuts over the head bearings. Everything seemed to come off willingly.
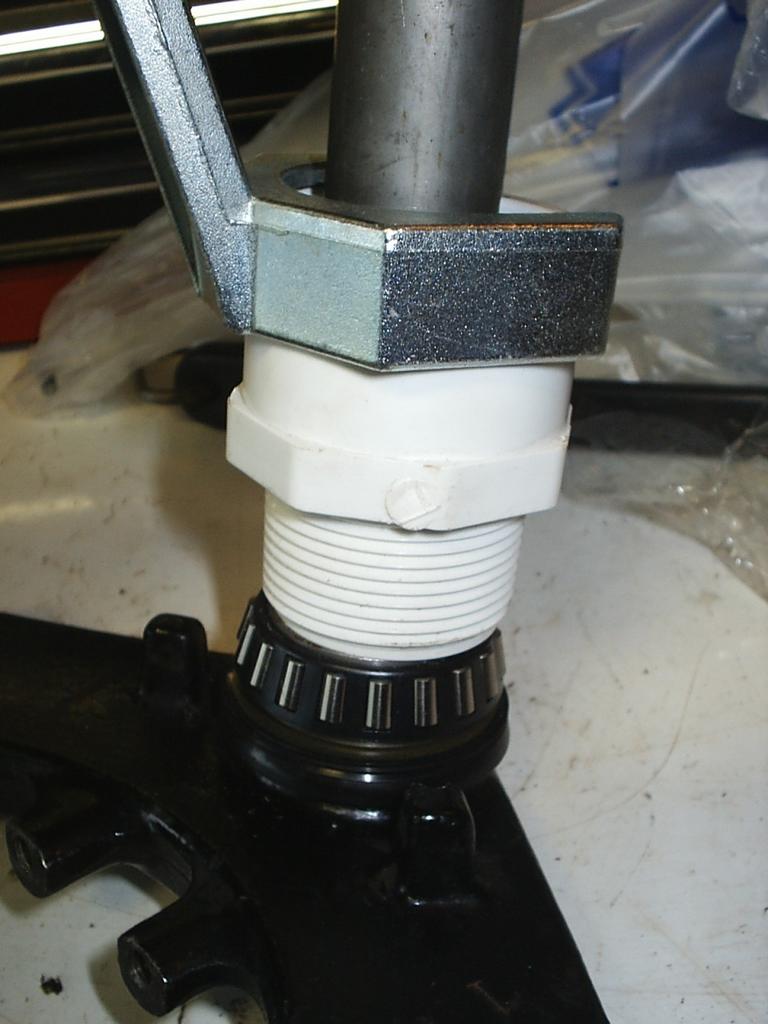
Pitted Races
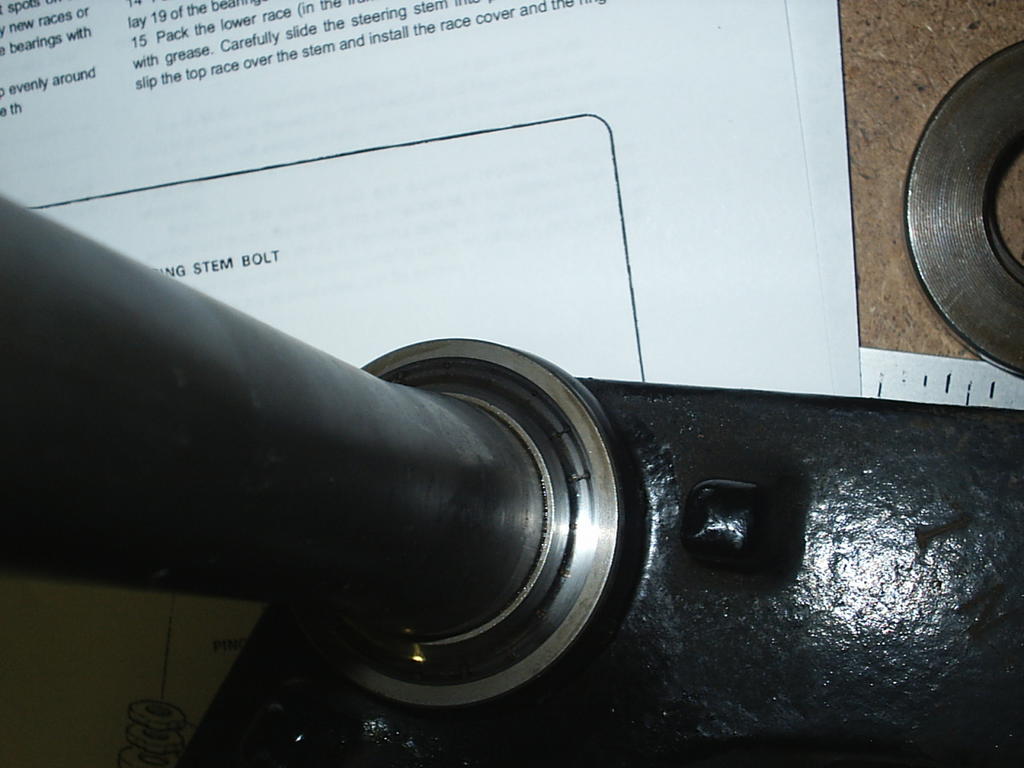
When I finally pulled the bike apart to the point where the races are, I found the races were pitted pretty good. The top lower and the bottom lower races were the worst. In the picture, you can see where the bearings were laying. I guess I now know why I could feel a dead spot nearly dead center in the steering.
Cold Metal

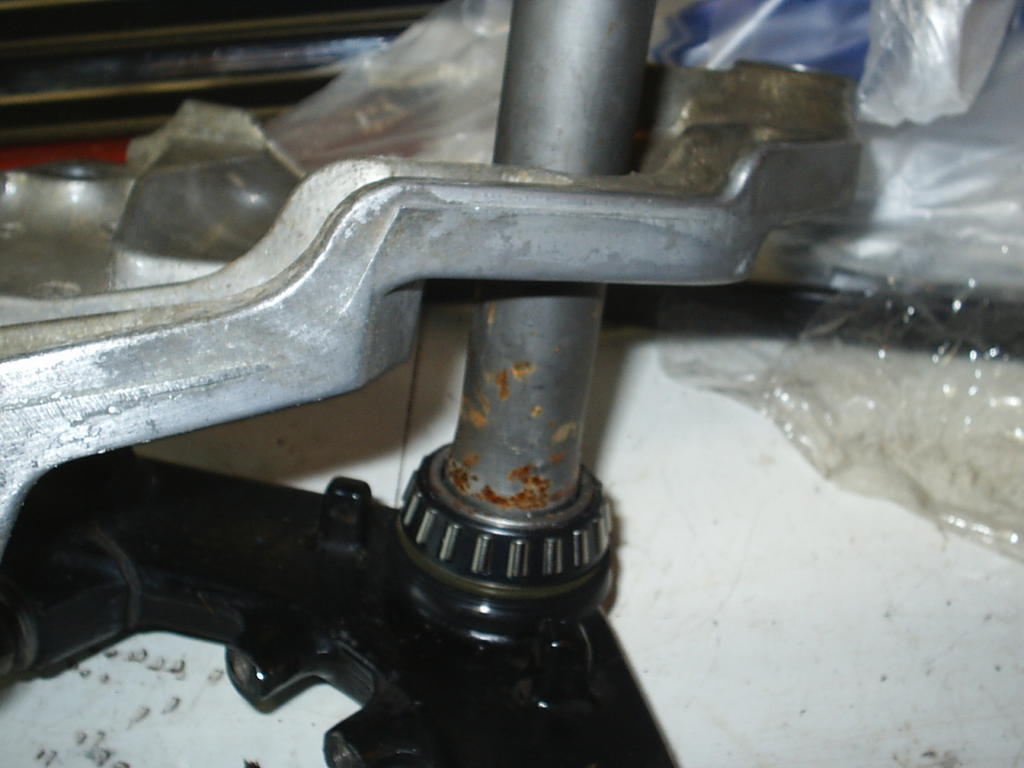
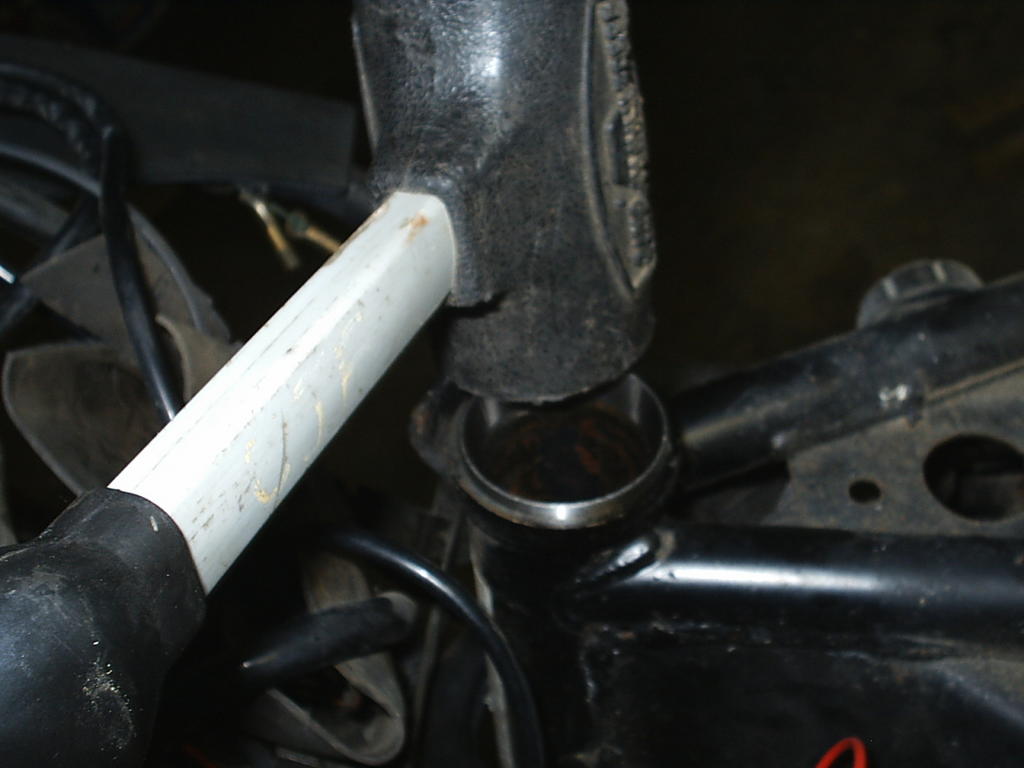
To help seat the races and the bearings where they belong, I placed the races and the steering stem in the freezer over night. Freezing the races helped a lot, they nearly dropped right into place. Getting the lower bearings onto the steering stem was another story. Freezing the steering stem didn't seem to help at all. I tried several different ways to tap the bearings onto the stem, the first was using a piece of PVC Pipe and a Plumbing Wrench. The PVC was too soft and didn't have enough UMPH to get the bearings on down the steering stem. I tried using a Socket Wrench extension to try tapping around the top of the bearings and that didn't seem to be making progress evenly. I found a spare Buddy Foot Peg Bracket from the Parts Vision. On that bracket is a hole that is the perfect size to slip down over the steering stem and fit the top of the bearings. I then used a hammer and tapped the bracket on top of the bearings to seat the bearings to the bottom of the steering stem. That worked.
Seating the bearing races
Seating the roller bearing races was a lot easier that seating the lower roller bearing. The use of a rubber dead blow hammer was all it took to seat the upper race. The lower race was a little more difficult, only because the race sits up inside the head tube. You can't easily swing a hammer to seat the race, you need a punch being very careful not to damage the inside of the race.
Tapered Roller Bearings Installed
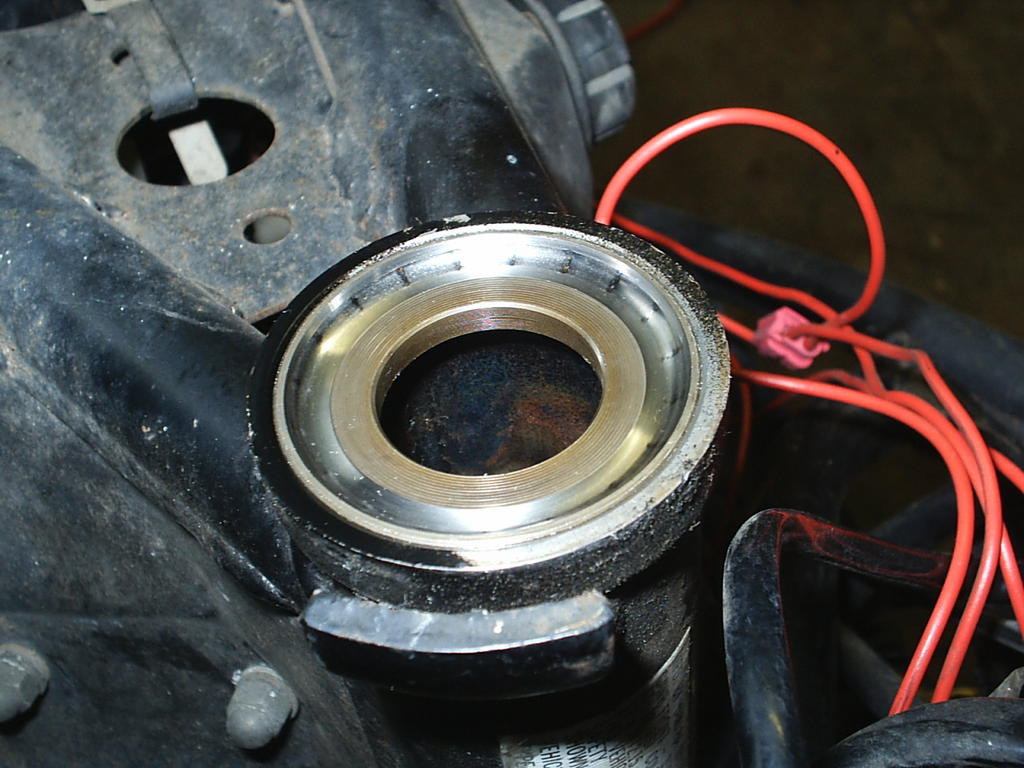
After completing the entire process, I am guessing that it is a good thing that the only left over parts that I had were the old races and ball bearings. No extra parts is not a bad thing. However, when I took the bike for a test ride, I noticed I still had the slight head shake. The shake is better than it was before and a lot better that right after I dropped the bike. I guess I am making progress but not quite there yet. The entire front end of the bike feels much more secure on the road, so I am happy with the upgrade. While putting it all back together, I am glad I checked to see if my lights were still working. Apparently, my headlight was not. A loose and corroded connector in the rubber pouch behind the headlight was the culprit. I am glad I fixed it when I did and didn't have to pull it all apart again. I also coated the inside of the tachometer with dry graphite lubricant and that helped make my tach a little more responsive.
Friday, October 07, 2005
ROV Withdrawals
Someone, anyone, please help!! It's been two days now and there is something wrong with the Riders of Vision website. I think someone hacked into it. Now it just shows the ROV Logo. If the site stays down much longer, I am going to have to check myself into a psychiatric center. I just did major surgery on my Yamaha Vision and can't check the ROV site after putting her all back together. Someone help me, I feel my mind slipping away. I NEED ACCESS TO ROV. Oh, sorry Doctor, I will keep my voice down. (SSHHhhh, I don't wanna wear the straight jacket again).
![]()

